Table of Contents
- What You’ll Need Before Starting
- Preparing Your Site and Slope for Riprap Installation
- Understanding Geotextile Fabric for Drainage
- Step-by-Step Installation Process for Riprap
- Riprap Installation Depth Requirements
- Best Tools for Moving Riprap
- Riprap Stone Pricing and Material Selection
- Common Installation Mistakes to Avoid
- Frequently Asked Questions
Last Updated: September 21, 2026
What You’ll Need Before Starting
Learning how to install riprap for drainage requires riprap stone in various sizes, geotextile fabric, a filter layer of smaller aggregate, and proper drainage outlet protection to meet engineering standards for erosion control and slope stability.
Before you start, gather these essentials:
- Riprap stone (various gradations for proper placement)
- Geotextile fabric (for soil retention and drainage)
- Filter layer aggregate (sand or small gravel)
- Drainage ditch materials (if creating outlet protection)
- Shovels, rakes, and compaction tools
- Heavy equipment (if working on larger slopes)
- Measuring tape and level
- Safety equipment (gloves, boots, eye protection)
FST Sand supplies precision-processed riprap and aggregate materials that meet industry standards.
Preparing Your Site and Slope for Riprap Installation
Site preparation determines success or failure. A poorly prepared slope shifts under water pressure, creating gaps that allow soil erosion.
Start by assessing your slope angle. Steeper slopes need more aggressive riprap sizing and better anchoring. Remove vegetation, loose soil, and debris from the area where you’ll install riprap. Compact the subgrade to create a stable foundation. This step prevents the riprap from sinking unevenly after installation.
Check your drainage flow path. Water should move downslope toward your outlet, not pool against the riprap, which creates hydrostatic pressure that pushes riprap outward.
For larger projects, heavy equipment compacts soil and reduces permeability. Professional contractors use slope stability analysis to determine riprap thickness and stone gradation for specific site conditions.
Understanding Geotextile Fabric for Drainage
Geotextile fabric for drainage separates soil from stone while allowing water to pass through, preventing soil particles from migrating into riprap voids and clogging your drainage system.
The fabric acts as a filter layer between subgrade and riprap, retaining fine soil particles while permitting water flow. Choose fabric with appropriate permeability for your site conditions.
Overlap fabric sections by at least 12 inches and staple every 12-18 inches along overlaps. Staples prevent fabric from shifting during stone placement and creating weak points where soil can escape.
Step-by-Step Installation Process for Riprap
Understanding how to install riprap for drainage follows a specific sequence. Each step builds on the previous one.
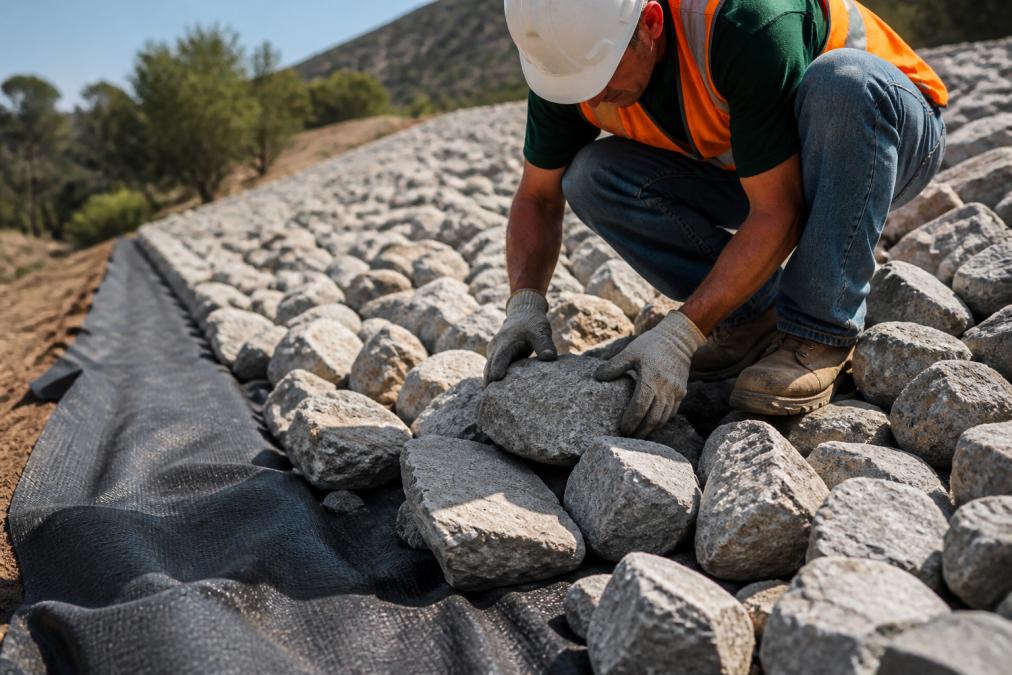
Step 1: Lay the Geotextile Foundation
Unroll geotextile fabric from top to bottom, keeping it smooth and tight against the subgrade. Wrinkles trap air and create weak points.
Overlap fabric edges by at least 12 inches and secure with landscape staples every 12-18 inches in a consistent pattern. Extend fabric beyond the riprap installation area to prevent soil migration around edges.
Step 2: Place Your Filter Layer
The filter layer is aggregate material smaller than riprap, typically sand or small gravel 1/2 to 1 inch in diameter, bridging the gap between fine soil and large stone.
Spread the filter layer 4-6 inches thick over the geotextile and compact lightly with a hand tamper to avoid reducing water flow capacity.
Step 3: Install Riprap in Proper Gradation
Riprap gradation means using stones of different sizes in the right proportion. Larger stones provide structural stability. Smaller stones fill voids and prevent water from forcing stones apart.
Follow this typical gradation pattern from bottom to top:
- Bottom layer: largest stones (6-12 inches)
- Middle layers: medium stones (3-6 inches)
- Top layer: smaller stones (1-3 inches)
This arrangement allows water to flow through while maintaining stone interlocking. Interlocking prevents individual stones from moving under water pressure or soil settlement.
Place stones by hand for small projects or with equipment for larger ones.
Step 4: Create an Outlet Protection Area
Your riprap endpoint needs outlet protection to prevent water from scouring around the riprap edge.
Riprap Installation Depth Requirements
Riprap depth depends on water velocity, slope angle, and stone size.
Best Tools for Moving Riprap
Riprap is heavy. The right tools make installation faster and safer.
For small residential projects:
- Wheelbarrow (for carrying smaller stones)
- Hand truck or dolly (for moving medium stones)
- Shovel and pry bar (for adjusting stone position)
For larger commercial projects:
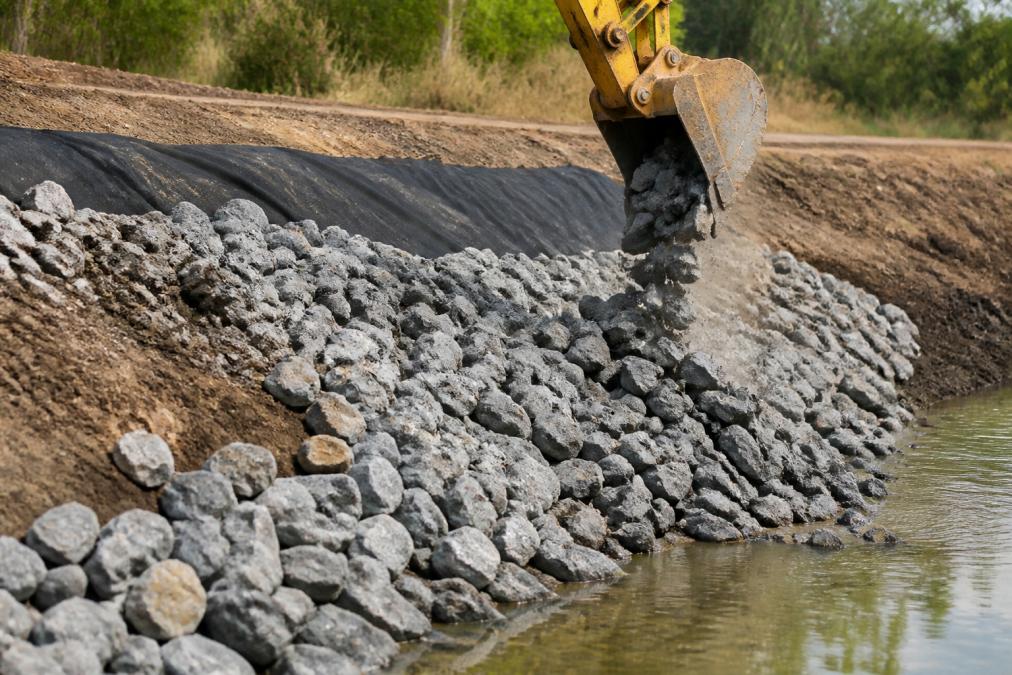
- Excavator with bucket (most common for placement)
- Dump truck (for material delivery)
- Front-end loader (for moving material to the slope)
- Skid-steer loader (for tight spaces)
Riprap Stone Pricing and Material Selection
Riprap selection involves more than cost and availability. Local regulations, environmental standards, and engineering specifications dictate which stone types are acceptable.
Regulatory and Permitting Considerations
Before purchasing riprap, verify what your jurisdiction allows. Many areas have specific requirements for erosion control materials.
Stone Type Selection by Site Conditions
When selecting riprap stone, consider these factors:
Stone type and durability:
- Granite: Highly durable, resists freeze-thaw cycles. Best for long-term installations and harsh climates. Most expensive.
- Limestone: Moderate durability. Dissolves in acidic water (pH below 6.5). Not recommended for acid mine drainage areas. Mid-range pricing.
- Basalt: Very durable for high-velocity applications. Often more expensive than granite due to limited availability.
- Recycled concrete: Cost-effective where permitted. Check local regulations, some jurisdictions prohibit it for visible erosion control.
- Quarry stone (mixed): Locally available stone. Often most cost-effective if suitable for your site.
Gradation and sizing:
Proper size distribution is critical. Poorly graded stone creates voids that allow soil migration.
- Typical riprap gradation: 30% stones 6-12 inches, 40% stones 3-6 inches, 30% stones 1-3 inches. High-velocity sites require larger stone; low-velocity sites can use smaller average stone to reduce costs.
Request a gradation curve from your supplier and compare it against your project specifications. Third-party testing certifies gradation and durability; quality stone costs more upfront but lasts longer.
Sourcing and Delivery
Local sourcing: Using locally sourced stone reduces delivery costs and environmental impact.
Seasonal pricing: Stone prices fluctuate seasonally.
Material Quality and Testing
Key specifications to request: gradation curve, durability index, Los Angeles abrasion value, and soundness test results.
Common Installation Mistakes to Avoid
Most riprap failures happen months or years later when underlying conditions shift. Understanding failure modes helps you prevent costly repairs.
Undermining: The #1 Riprap Failure Mode
Undermining occurs when water flows beneath the riprap instead of across it, eroding soil from underneath. The riprap appears intact from above but has lost its foundation. Within weeks, stones settle and gaps form.
Root causes of undermining:
- Geotextile fabric with wrinkles or gaps allowing soil escape
- Filter layer too thin (less than 4 inches) or missing
- Outlet protection too short, allowing water to scour backward under the riprap toe
- Slope preparation leaving low spots where water concentrates
Stone Displacement and Sorting
Riprap shifts when water velocity exceeds the stone’s stability threshold. Smaller stones migrate downslope while larger stones remain, creating a “sorted” layer that loses proper interlocking.
Why sorting happens:
- Riprap depth insufficient for actual water velocity
- Stones not properly interlocked during placement
- Gradation too uniform (all similar sizes)
- High-velocity water from concentrated drainage sources
Geotextile Fabric Failure
Common fabric problems:
- Overly dense fabric: Blocks water flow, creating hydrostatic pressure that pushes riprap outward. Choose fabric with permeability of at least 100 gallons per minute per square foot.
- Inadequate overlap: Sections overlapped less than 12 inches allow soil escape at seams. Increase overlap to 18 inches on high-flow sites.
- Insufficient stapling: Loose fabric bunches during stone placement. Staple every 12 inches on flat slopes, every 8 inches on steep slopes.
- UV degradation: Fabric exposed to direct sunlight degrades within 6-12 months. Always cover fabric with riprap or filter layer immediately after installation.
Slope Instability and Settlement
If your entire riprap installation shifts downslope, the subgrade wasn’t properly compacted.
Solutions:
- Remove riprap and re-compact subgrade to 95% Standard Proctor density
- Add drainage channels to prevent water from pooling behind riprap
- Consider a geogrid layer (reinforcing mesh) under the geotextile on steep slopes to anchor the entire system
Water Velocity Miscalculation
How to assess velocity:
- Observe water flow during heavy rain. If water makes noise (rushing or roaring), velocity exceeds 3 feet per second, your riprap is too shallow.
- Most residential slopes should assume 2-4 feet per second during design storms.
- High-velocity sites require riprap 36+ inches deep with stones 6-12 inches in diameter.
If you observe riprap movement during the first heavy rain after installation, immediately add larger stone or increase depth.
Outlet Scour and Erosion
Prevention strategy:
- Extend riprap at least 5 feet downslope from where water exits
- Create a riprap apron (wider, shallower area) at the outlet to slow water velocity
- Install a riprap toe trench, a 12-18 inch deep channel at the outlet that catches displaced stones
- Ensure the outlet connects to a stable drainage system (ditch, swale, or storm drain)
Monitor your installation after the first three heavy rain events. Most failures occur within the first year. Early detection prevents expensive complete replacement.
Frequently Asked Questions
Do you need fabric under riprap for drainage?
Yes, geotextile fabric under riprap is essential for proper drainage systems. The fabric prevents soil from washing through the stone while allowing water to flow freely. It also acts as a filter layer, reducing sedimentation and maintaining the permeability of your drainage system. Without it, soil particles migrate into the riprap voids, reducing flow capacity and causing system failure over time.
How deep should riprap be for effective drainage?
Riprap installation depth requirements typically range from 12 to 24 inches, depending on water velocity and slope conditions. For low-velocity drainage applications, 12-18 inches is usually sufficient. High-velocity channels or steep slopes require 18-24 inches or more. The depth must account for stone interlocking and settlement, so always install thicker than the minimum design depth to compensate for material shifting.
What is the difference between riprap and decorative gravel?
Riprap consists of large, angular stones (typically 4-12 inches) engineered for erosion control and bank stabilization, meeting specific gradation standards for drainage and slope stability. Decorative gravel is smaller, often rounded, and chosen primarily for aesthetics rather than hydraulic performance. Riprap provides superior stone interlocking, durability, and flow capacity, while decorative gravel offers visual appeal but lacks the engineering specifications needed for serious drainage or erosion control applications.
What tools do you need for moving riprap during installation?
Best tools for moving riprap include heavy equipment like excavators, backhoes, or skid-steer loaders for large projects. For smaller applications, wheelbarrows, hand trucks, or landscape rakes work for repositioning stones. Shovels and pry bars help with fine placement and adjustments. Proper equipment reduces labor time and ensures accurate stone placement for optimal interlocking and drainage performance.